



Autoflower ScrOG Technique: Yes or No?


Screen of Green (ScrOG) is a popular low-stress training (LST) technique used to control the growth of cannabis plants. The ScrOG method, also known as the screen of green growing method, involves training plants to grow horizontally through a trellis.
This strategy helps you train your plant’s branches to grow horizontally through a trellis. It improves airflow and maximizes space. However, autoflowers have short growth cycles, which may make you wonder if a ScrOG grow is an ideal technique.
In this article, you'll learn about the pros and cons of ScrOG for autoflowers, how the technique works, and why other training methods may be a better choice for short-cycle plants.
Key Takeaways
- The ScrOG technique uses a mesh screen or trellis to flatten plants, forcing them to grow horizontally.
- Scrogging is possible for autoflower plants, but we don't recommend it because it takes longer and isn’t ideal for the short life cycle of autoflowers.
- The ScrOG method requires more work and can be tricky for beginners.
What Is ScrOG and How Does It Work?
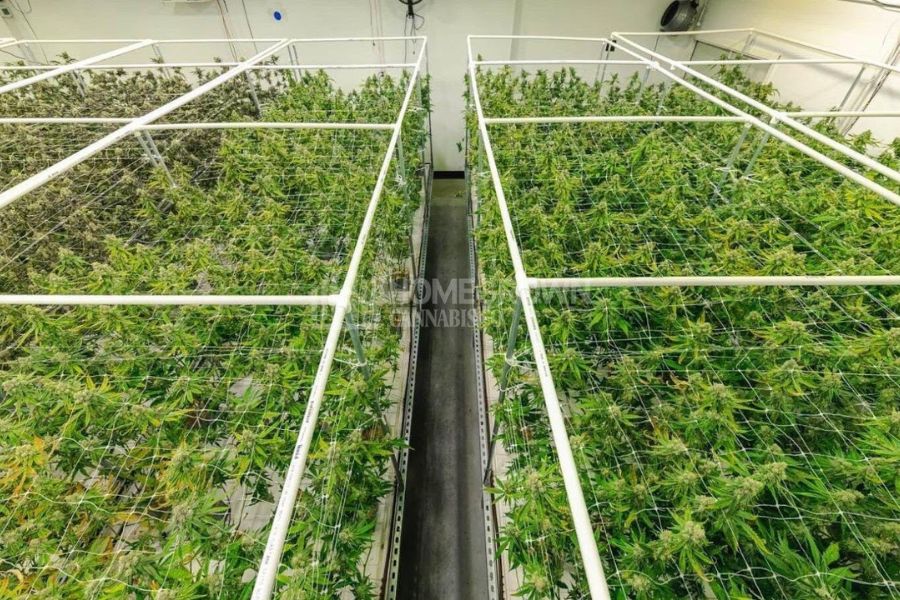
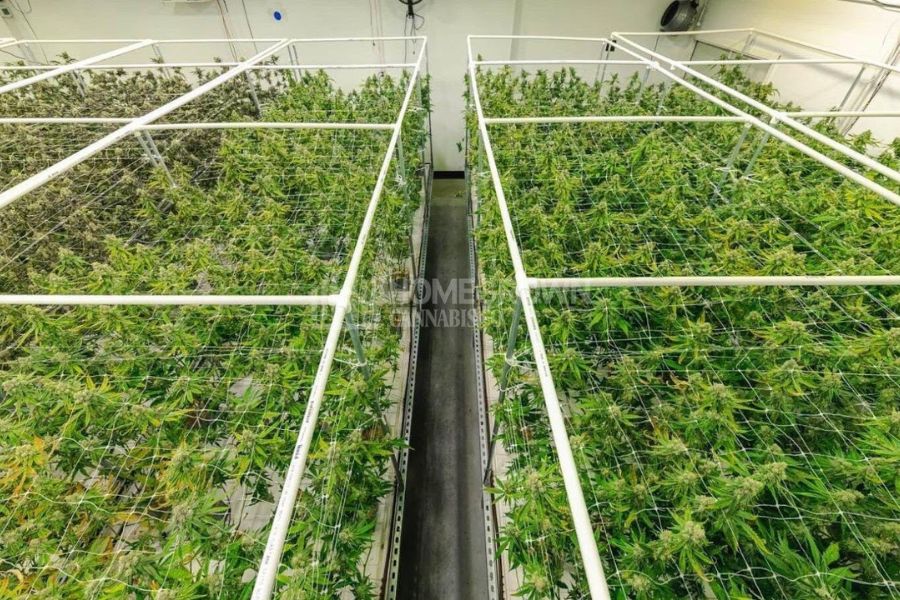
ScrOG, short for Screen of Green, is a training technique that uses a net or screen to encourage cannabis plants to grow horizontally rather than straight up. This creates a more even canopy and helps the top buds receive more consistent light.
Here's how the ScrOG technique works:
-
As your plants grow taller, you place a ScrOG net or screen just above them.
-
The plant grows up through the net. Once the branches poke through, you gently tuck and weave them into the screen, guiding them to grow in the direction you want.
-
This spreads the branches horizontally, creating a more uniform canopy and making better use of the available growing space.
Scrogging Autoflowers: What You Should Know
Autoflowering cannabis plants automatically flower based on age rather than light cycles. Using the ScrOG method usually requires plants to have longer vegetative periods, and since autos have a shorter lifecycle, they may not have time to develop a full canopy as you hope.
Because the ScrOG growing method redirects the plant’s vertical growth horizontally, you’ll also be able to fit fewer plants in a smaller grow space.
However, there are some pros and cons to consider.
Benefits of ScrOG
The main benefit of the ScrOG growing method is that it optimizes canopy coverage, light, and air circulation.
Let's look into these benefits:
1. Better light exposure: The more even distribution and penetration of light produce fat buds at the top of plants and also on lower branches so they don't decline in size and density.
2. It saves vertical space, especially for indoor growing: With a ScrOG screen, you’ll save vertical space, which is especially useful for indoor grows.
3. Higher gram per watt ratio: By optimizing the use of the available light and training your plants to grow laterally, you waste less light as you’ll have a wider, more even canopy.
The Downsides of Scrogging Autoflowers
Before considering ScrOG for your autoflower, consider the drawbacks that come with this ScrOG technique:
1. Not ideal for fast-growing autoflowers: The 6-8 weeks of vegetative growth needed for ScrOG is almost the lifecycle of an autoflower, which might not have time to develop the optimal canopy.
2. Requires more work: ScrOG plants require regular maintenance, especially throughout most of the vegetative stage. New shoots will have to be woven into the screen regularly.
3. Not ideal for totally new growers: ScrOG can be challenging and is definitely on the advanced side of plant training techniques. It requires time, skill (especially for tucking stems), and a thorough understanding of how autoflowers grow.
4. Limited access for maintenance: Access for plant maintenance can be limited, especially in small grow tents. Difficulty accessing all parts of the plant can affect aspects of plant care like defoliating, checking for pests, and training. You’ll need appropriate equipment like a hose wand.
To better understand the labor intensity of a cannabis ScrOG grow and why you may want to choose to forego this method, here's what the process involves:
ScrOG Step-by-Step Guide
Before you start scrogging, you'll need a few basic supplies and a suitable setup. Gather your equipment first, then follow these steps to train your plants through the ScrOG net.
Equipment Needed for Screen of Green Growing Method
- ScrOG net or screen: The main element you need for ScrOG is a net or screen with wide holes.
- Frame: You’ll need a lightweight wooden, metal, or plastic frame to support the screen. Reusable elastic ScrOG nets with hooks can also attach directly to the frame of a grow tent.
- Scissors: Useful for cutting excess netting when creating the frame.
- Gardening twine: For securing and holding branches in place during the process.
Step 1: Create a Frame and Grid Using the Trellis Net
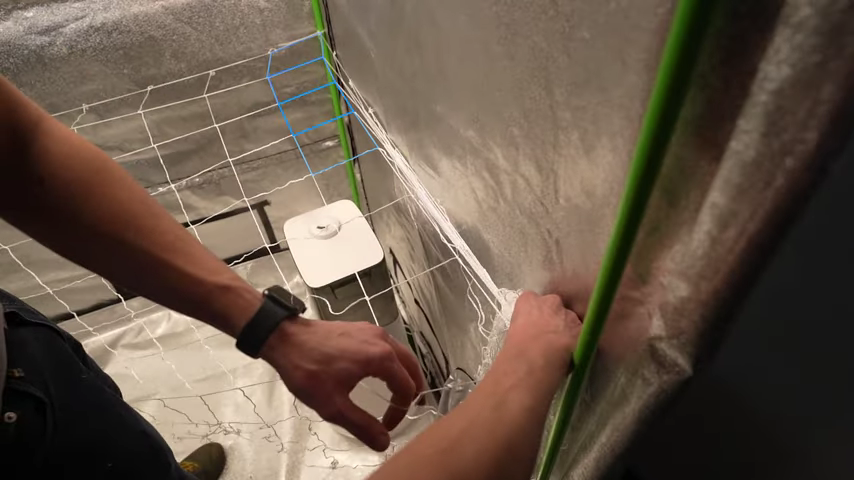
Create a lightweight frame and use twine to make a trellis or chessboard-style grid. Prepare corner posts and connect them to the screen.
Step 2: Decide How Tall You Want to Grow Your Plants
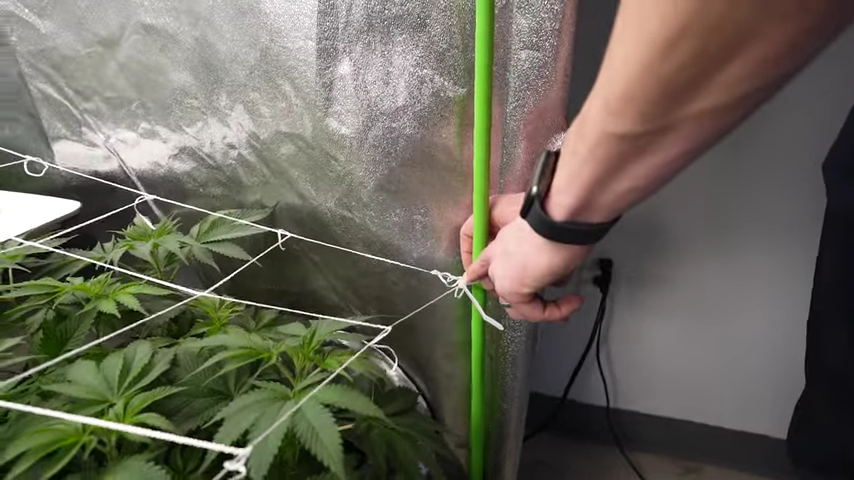
Different strains grow and stretch to different lengths, so make sure you have a plan. The screen should rest 6-11 inches below the intended final height of your plants. Most screens are 1-2 feet high maximum—any taller means significant extra pruning below the canopy.
Step 3: Guide New Growth Through the Net
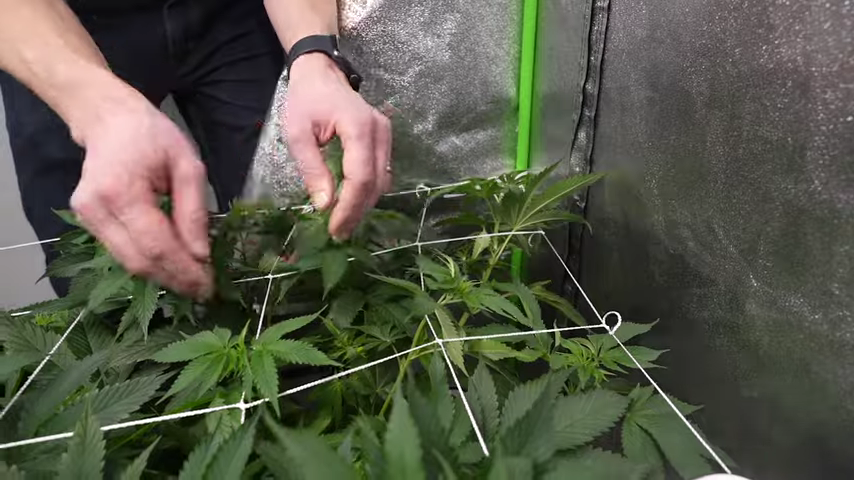
Once the ScrOG net is in place, allow the plants to grow through the holes in the grid. If needed, you can add additional layers of netting as the plants grow.
Don't wait too long to bend the stems through the trellis. Older, thicker branches are less pliable and are more likely to break or snap when woven through the netting. New growth is easier to train, which is especially important with autoflowers that have less time to recover from damage.
Gently ease the shoots beneath the framework so they grow horizontally. They'll soon turn back toward the light, so continue tucking them through the net as needed.
Step 4: Train Your Shoots Daily
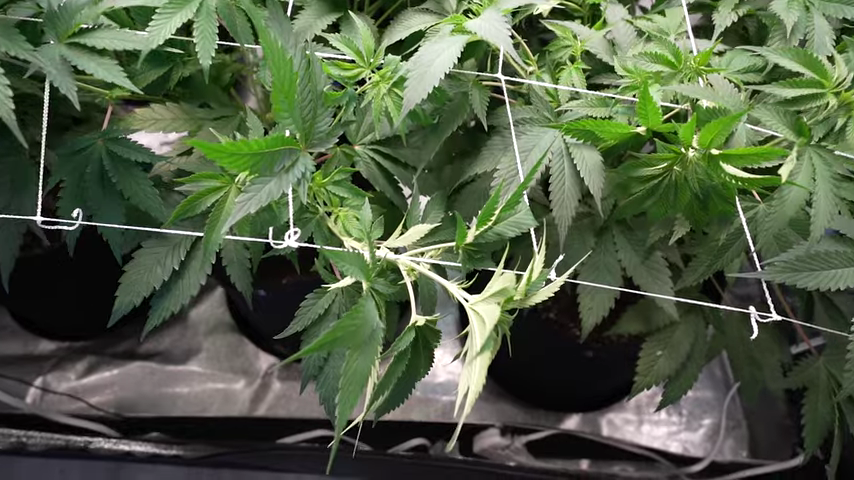
Train your shoots every day, especially larger shoots around the edges, to keep the canopy even and well distributed. Stay consistent with tucking and weaving as new growth develops.
Aim for the canopy to cover about 70% of the ScrOG net before flowering begins. Once your canopy is established, knowing when to switch from veg to flower can help you time the next stage of growth.
Step 5: Stop Tucking and Weaving Once Flowering Begins
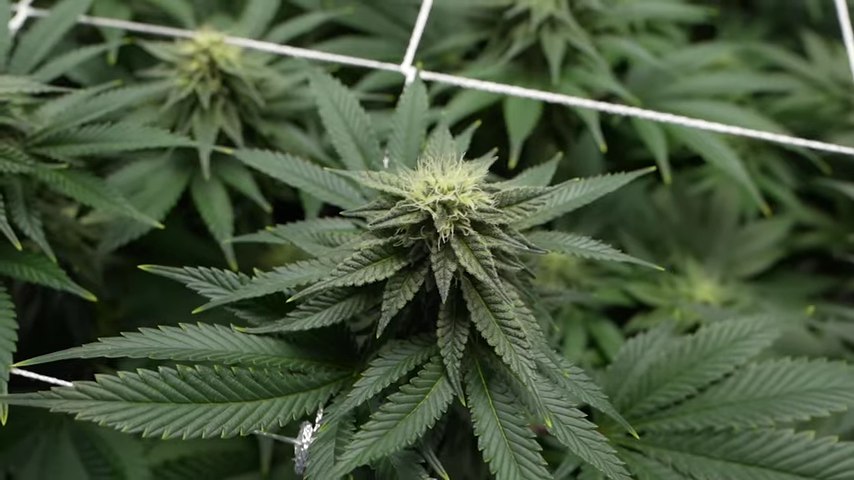
After a few weeks of flowering, vertical growth slows down significantly. At this point, stop tucking and weaving, and let the buds grow above the net.
Let the bud sites develop and thicken without continuing to manipulate the branches.
Step 6: Tie Down Large Colas
If the colas become too large or grow too close to the lights, raise the lights to prevent accidental breakage or light burn.
Don't try to weave large colas through the screen again, as doing so could damage the buds or stems.
By this point, you can see that scrogging autoflowers requires additional equipment and, more importantly, can be a labor-intensive process.
Final Thoughts
While it is possible, autoflowers in general are not the best choice for ScrOG training. This method takes longer to be effective.
Even if you choose to use this method for other cannabis strains, we would recommend it for intermediate to advanced cultivators, considering the pros and cons.
If you're new to growing autoflowers, it's worth learning how to scrog before trying this technique. Let them do their thing and develop normally, and you’ll learn a lot about their growth cycle. Meanwhile, where you get your autoflower cannabis seeds also matters.
At HomeGrownCannabis, we're proud to be a leading one-stop shop for quality cannabis seeds and resources, including high-quality autoflower seeds. Our goal is to help growers like you have a better cultivation experience.